Showing posts with label Snacks. Show all posts

Monday, December 14, 2020

Sneaky Chocolate Pudding [dairy-free, gluten-free, vegan]

I'm always coming up with ideas of foods to make our grandson. This one, I am calling Sneaky Chocolate Pudding. I did not tell my husband what was in it when he tried it, and he said, "That's delicious!"
Optional: Add some cooked and cooled Hannah sweet potato or some banana and reduce the maple syrup.

Big handful of kale
Big handful of spinach
1/4 cup cooked kidney or black beans
1/2 T ground flaxseed
6 T maple syrup
1/4 cup cacao powder
1/2 small avocado
1/2 cup lite coconut milk

Cook the greens in a little water for about 5 minutes in a skillet (or 1 minute in the microwave), until tender and just turning color. Drain off water and add to a high-speed blender with the rest of the ingredients. Blend well until super smooth and creamy. You will need to gently stir often because this is a thick mixture and you want to make sure all of it gets blended well. Chill before serving.

Tuesday, September 22, 2020

Chocolate Chip Banana Muffins [oil-free, dairy-free, egg-free, vegan]


Makes 8 muffins


NOTE: I have found THE BEST baking pans by USA pan. These muffins literally fall out of the cups--even though I don't use any oil!

1 cup oat flour, finely ground
1 cup white whole wheat flour
1 scant teaspoon baking soda
1/4 teaspoon salt
2 very ripe bananas
5 gooey Medjool dates, pitted
2 teaspoon non-alcoholic vanilla extract
1 T creamy almond butter (no salt, oil, or sugar added)
1/2 cup non-dairy, plant-based milk
1/4 cup vegan chocolate chips plus 24 extra chips to decorate the tops of the muffins

Preheat oven to 400 degrees F.
In a blender, blend the bananas, dates, vanilla, almond butter, and plant-based milk until smooth and creamy. In a medium-size mixing bowl, add the flours, baking soda, and salt. Whisk to combine well. Stir in the wet mixture until just combined. Do not overmix. Fold in the 1/4 cup of vegan chocolate chips. Fill 8 muffin cups with the batter. Top with 3 extra chocolate chips per muffin.
Bake for 18-20 minutes. 

Disclosure: Mrs. Plant makes use of Amazon.com affiliate links when they are available. These are products I have personally purchased and recommend based on my experience with them. Your use of these links for product purchases provides me with a commission which pays for the food and supplies I use to keep this website alive. However, your use of these links as a reader is not required.

Monday, September 14, 2020

Roasted Nacho Chickpeas [oil-free, gluten-free, vegan]


These are amazing on salads instead of croutons! Also, they are super snackable and great for people with diabetes.

3-4 cups cooked and chilled chickpeas (I like to use home-cooked in the Instant Pot best!)
1 T tahini (a good runny one like Shirley Bar Living, which is my fave!)
1/2 t cumin powder
1 t chili powder
1/2 t garlic powder
1/2 t oregano (Mexican is best, but use what you have)
1/2 t salt
1/4 t smoked paprika
1 T nutritional yeast flakes (my favorite brand is Sari Foods!)

Preheat oven to 375-400 degrees.
NOTE: It is best to start the heat higher and lower the oven temperature as they begin to roast if they are getting too brown. 

Rinse the chickpeas off well and place them in a clean kitchen towel. Gently cover them with the towel and dry them off by patting them. They must be as dry as you can get them before seasoning and baking. If there are any skins that have fallen off, remove them. 

In a medium bowl, add the tahini. Then, add in the chickpeas and use a small silicone spatula to coat the chickpeas with the tahini. Add all of the spices together and mix them to combine well. Sprinkle the spice mixture over the chickpeas as you continue to toss them around in the bowl and cover them well. Use as much seasoning as you like. 

Gently place the chickpeas on baking trays (with sides) in a single layer. Bake for up to an hour, lowering the heat if necessary and stirring the chickpeas every 15 minutes. You have to take a chickpea out of the oven and let it cool a bit before you can tell if they are completely crispy. If they are browning too much, lower the heat a bit.

Disclosure: Mrs. Plant makes use of Amazon.com affiliate links when they are available. These are products I have personally purchased and recommend based on my experience with them. Your use of these links for product purchases provides me with a commission which pays for the food and supplies I use to keep this website alive. However, your use of these links as a reader is not required.

Wednesday, September 9, 2020

Banana Pecan Cacao Loaf [oil-free, dairy-free, egg-free, refined sugar-free option]


3 very ripe bananas (can be frozen and defrosted)
1/2 cup unsweetened apple butter
5 large, gooey Medjool dates, pitted
1/2 T vanilla extract
1 cup white whole wheat flour
1/2 cup almond flour
3/4 t baking soda
1/2 t salt
1/4 cup pecans, chopped
1/4 cup vegan chocolate chips (optional)

Preheat oven to 350 degrees F.
In a blender, combine the bananas, apple butter, dates, and vanilla until smooth and creamy. Set aside.
In a large bowl, combine the flours, baking soda, and salt. Add the wet mixture to the dry and mix to combine well--but do not overmix. Add the chopped pecans and chocolate chips (if using) and fold in. Pour mixture into a loaf pan and bake for 50 minutes. Test with a toothpick. If the toothpick comes out clean and the top can be lightly pressed and bounce back, it is ready to remove from the oven. Cool before cutting and serving. Can be store in the refrigerator for 5 days in an airtight container or wrapped well and frozen. 

Diclosure: Mrs. Plant makes use of Amazon.com affiliate links when they are available. These are products I have personally purchased and recommend based on my experience with them. Your use of these links for product purchases provides me with a commission which pays for the food and supplies I use to keep this website alive. However, your use of these links as a reader is not required.

Tuesday, July 7, 2020

Bean 'O Caramel Bars [dairy-free, low-glycemic, oil-free, vegan]


NOTE: This recipe CAN be made with other cereals (like Cheerios), but this recipe was designed to be low-glycemic for Type 2 diabetics.You can also replace the coconut nectar with maple syrup.

4 cups Three Wishes Unsweetened O's Cereal
1/4 cup smooth almond butter (made from only dry-roasted almonds)
1/4 cup coconut nectar (found at Sprouts, Whole Foods, or online)
3 T coconut sugar
slightly less than 1/4 t salt
1 1/2 t vanilla

In a large bowl, measure out 4 cups of the cereal. Set aside.
Line an 8x8 baking pan with parchment paper and set aside.
In a small saucepan, add the almond butter, coconut nectar, coconut sugar, and salt. Cook over medium heat, stirring to combine all of the ingredients. When the mixture begins to softly boil, let it do so for about 1 minute as you continue stirring. Remove from heat and stir in the vanilla. Pour the mixture over the cereal and stir with a silicone spatula until all of the pieces are coated well. Turn the mixture out into the parchment-lined pan and press it into the pan evenly with the back of the spatula. Place in the freezer for at least 2 hours to  harden up. Then, lift out the parchment paper, and place it on a cutting board. Cut into 9 squares. Serve!

NOTE: These bars store well in the refrigerator or the freezer in an airtight container.

Disclosure: Mrs. Plant makes use of Amazon.com affiliate links when they are available. These are products I have personally purchased and recommend based on my experience with them. Your use of these links for product purchases provides me with a commission which pays for the food and supplies I use to keep this website alive. However, your use of these links as a reader is not required.


Friday, May 22, 2020

Almond Pulp Banana Bread [refined sugar-free, dairy-free, oil-free, vegan]

3 large speckled ripe bananas
2 t vanilla extract
5-6 Medjool dates, pitted
1 t Ceylon cinnamon
1 1/4 cup of white whole wheat flour
1/2 t baking powder
1/2 t baking soda
1/4 t salt
1 T ground flaxseed
1 cup of almond pulp, just moist to the touch, but not super wet (this is the pulp that remains after you make homemade almond milk--NOT dry almond flour)

Preheat oven to 350 degrees.

In the blender, combine the bananas, vanilla, dates, and cinnamon. The mixture, after blended smooth, should be about 2 cups (check the tick marks on the side of your blender jar). If less, add a small amount of non-dairy unsweetened plant-based milk to equal 2 cups.  Set aside.

To a large mixing bowl add the whole wheat flour with the baking powder, baking soda, salt, and ground flaxseed. Whisk to combine well. Add in the almond pulp and the bananas mixture from the blender. Stir well to combine, but don't overmix. This will be a thick but moist mixture. Spoon into a nonstick, metal loaf pan. Let sit on the counter for 5-10 minutes before putting it into the oven. Bake for 40-45 minutes, until you can press gently on the top of the loaf, and it feels firm, but bounces back. Let cool, then remove from loaf pan. Wrap well and store in the refrigerator if you don't eat the whole thing the first day. 😄


 Disclosure: Mrs. Plant makes use of Amazon.com affiliate links when they are available. These are products I have personally purchased and recommend based on my experience with them. Your use of these links for product purchases provides me with a commission which pays for the food and supplies I use to keep this website alive. However, your use of these links as a reader is not required.

Wednesday, February 19, 2020

Pomegranate Chia Seed Pudding

1/2 cup plant-based milk
2-3 T pomegranate juice
2 T chia seeds
1/2 t vanilla
2 t of your favorite sweetener

Put all ingredients in a jar, small bowl or container that has a lid. Mix all ingredients together well with a fork for about 1 minute. After 3 more minutes, stir mixture again with a fork to make sure there is no clumping of the chia seeds. Cover container and chill overnight. Serve with your favorite fruit and nuts.


Disclosure: Mrs. Plant makes use of Amazon.com affiliate links when they are available. These are products I have personally purchased and recommend based on my experience with them. Your use of these links for product purchases provides me with a commission which pays for the food and supplies I use to keep this website alive. However, your use of these links as a reader is not required.

Monday, November 18, 2019

Oven-Baked Oil-Free Onion Rings

I hadn't made oven-baked onion rings in ages. Recently, I saw some that Shane and Simple had on his website, and it reminded me that I needed to make them again. His version is somewhat different, but it looks amazing, too! Check out his website. He has AWESOME whole foods plant-based oil-free recipes, too!

Chef's Note: Always use a different utensil to dip the onions into the batter than the one you use to dredge into the crumbs. Otherwise, you will get batter in the crumbs and those clumpy crumbs will not be usable.

1 large Vidalia (or other variety onion), sliced into 1/4-1/2" rings (depending on how thick you like them), air dry for 10 minutes

Batter: 
1 cup white whole wheat flour (or any kind of flour works)
1/4 t salt
1/4 t paprika
1/4 t garlic powder

Crumbs:
1 1/2 cups whole wheat bread crumbs
1/4 t salt
A few dashes of cayenne pepper if you want them spicy

Add the flour into a bowl plus enough water to make a batter that drips but will still stick to the onion slices (about the consistency of pancake batter). Add the salt, paprika, and garlic powder to it. Stir to combine.

In a shallow bowl, combine whole wheat bread crumbs with salt (and cayenne, if you want them spicy).

Dip individual sliced onion pieces into batter using a mini-sized pair of tongs, then drop the battered onion slice into bread crumbs. Using a fork and a gentle shaking motion of the bowl, coat the battered onion with the crumbs. Place battered and crumbed onion slices (one-by-one) on a parchment paper-lined baking sheet in a single layer. Make sure none of the onions touch each other. Bake at 450 degrees F until crispy. This will take 20-ish minutes, depending on the size of your onion slices. Serve with your favorite dipping sauce!

Sunday, October 13, 2019

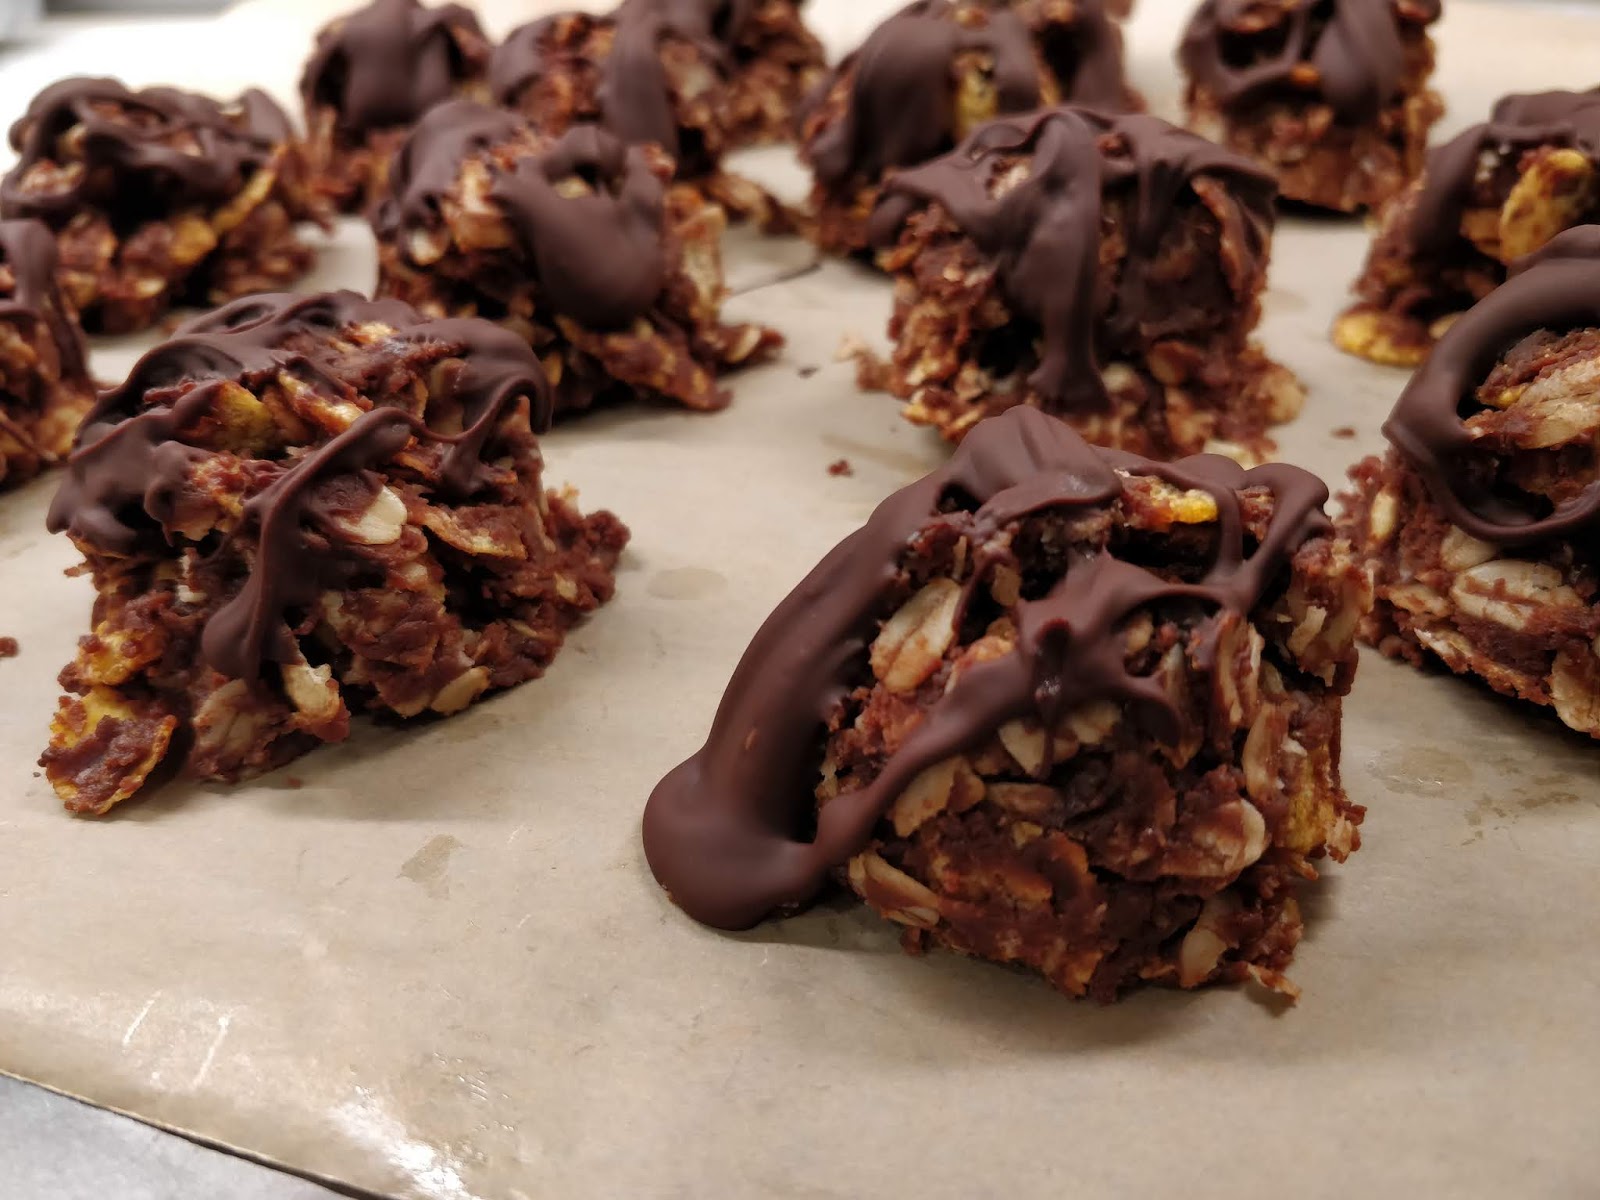
No-Bake Cookies [gluten-free, dairy-free, vegan]

1/2 cup natural peanut butter
1/2 cup maple syrup or bee-free honee
1/8 t salt
3 T cocoa powder
1 cup gluten-free rolled oats
1 cup organic corn flakes
1/2 cup vegan chocolate chips (optional)

In a large saucepan over medium heat, melt the peanut butter, maple syrup/honee, salt, and cocoa powder, stirring constantly until combined well. Keep cooking and stirring until small bubbles begin to form along the edges. Turn off heat and add in oats and cornflakes; stir well to combine. Drop mixture by spoonfuls onto a pan covered with wax or parchment paper. If desired, melt chocolate chips in microwave at 70% for 1-3 minutes or until melted. Stir well, then drizzle over cookies. Place cookies in the refrigerator to chill for 1-3 hours. Store in the refrigerator or freezer in an airtight container.

Monday, September 30, 2019

Crispy Roasted Chickpeas

Making Warm Grain Bowls for dinner tonight, and I love something crunchy in them. I made our favorite CRISPY roasted chickpeas to go in them.

1 can low-sodium or salt-free chickpeas, drained (not rinsed)
1 T almond butter, tahini, or mixed nut butter
1/2 t chili powder
1/4 t paprika or smoked paprika
1/4 t onion powder
1/4 t garlic powder
1/4 t salt (or more to taste)

Preheat oven to 320 degrees F.
In a small bowl, mix everything except the chickpeas. Add the chickpeas and coat well. Place on a parchment paper-lined baking sheet. Spread the coated chickpeas out on the pan. Bake for 30 minutes or until completely crispy. They shouldn't burn at this temperature, but still keep your eyes on them.

Saturday, July 27, 2019

Kale and Veggie Dehydrated Crackers

Check out my Amazon store to see my favorite brands of nutritional yeast flakes! Click on FOOD FAVES.

1/2 cup walnuts
1 bunch of kale, leaves removed from stems
4 vine-ripened organic tomatoes, cut into quarters
1 red bell pepper, remove pod and stem and cut into quarters
1 organic carrot, shredded
3 T ground flax seeds
1/4 cup nutritional yeast flakes
1/2 t garlic powder
splash of unsweetened plant-based milk
salt to taste

Take out a large bowl and set aside.
In a food processor, grind the walnuts into very small pieces. Place in the large bowl.
In batches, process the kale leaves, tomatoes, and red bell pepper into tiny pieces, then place into the large bowl.
Add the shredded carrots, ground flax seeds, nutritional yeast flakes, garlic powder, plant-based milk, and salt (start with 1/4 t and add as you mix and taste).
Stir all ingredients together well.
Split the batch onto two trays lined with non-stick liner or parchment paper and smooth out the mixture evenly to about 1/2" thick.
Dehydrate at 135 degrees until crispy (can take anywhere from 8-12 hours or more). Flip them over and dehydrate for 1 extra hour to make sure they are completely dried and crispy before storing in an air-tight container.

NOTE: If you want these to be 100% raw, it will take longer. Simply dehydrate at 115-119 degrees instead.

Thursday, November 8, 2018

Oven-Baked Oil-Free Cheezy Kale Chips

These kale chips are SUPER flavorful and made with healthy plant-based ingredients. They come out SUPER CRISPY, even though there is no oil in them!

1 large bunch of kale, washed, leaves removed and ripped into smaller pieces, and spun very dry
1/4 cup walnuts
1/4 cup nutritional yeast flakes
1/4 t garlic powder
1/2 t dry mustard
1 t chia seeds
1/4-1/2 t salt
1 t apple cider vinegar
A couple of sprinkles of cayenne pepper
1/3 cup soy milk

Preheat oven to 275 degrees. Line a baking pan with parchment paper or a silpat. Mix all ingredients, except kale, in a cup blender just until combined and no big walnut pieces are left. Pour sauce over kale and mix well to coat all pieces. Bake 15-20 minutes, then flip kale pieces over to bake other side. Bake another 10-15 minutes, or until all pieces are fully crispy. You may need to remove thinner or smaller pieces at this time and let the thicker pieces finished baking.

Sent from TypeApp

Tuesday, July 24, 2018

BBQ Jicama Chips

Jicama is a root vegetable from Central and South America. Many people call it the "Mexican Potato." The inner consistency is like a mix between a white potato and a pear. It's a bit on the sweet side and can be used in hot or cold dishes. Only the inner "meat" of the jicama is edible. The vine and seeds are actually poisonous!

Jicama is loaded with vitamins, minerals, phytonutrients, and other organic compounds, including dietary fiber, vitamin C, vitamin E, folate, vitamin B6, pantothenic acid, potassium, magnesium, manganese, copper, iron, and a small amount of protein. Since there is an especially large amount of vitamin C in jicama, it is helpful in boosting the immune system when eaten regularly. Plus, there are several other health benefits that can be researched by a simple Google search.

A while back, I had the pleasure of tasting a packaged jicama chip, but I wasn't thrilled with the fact that even though they were baked and not fried, they still had some oil in them. So, I decided to make my own at home!

First, I made the seasoning for the chips. The ones I had in the package were BBQ flavored, so this is what I came up with, and it's delicious!

Seasoning:
1 t paprika
1/2 t smoked paprika
1/2 t garlic powder
1/4 t onion powder
1/4 t salt
1 1/2 t raw sugar

Then, I sliced the outside "rind" off of the jicama with a sharp knife. I used a mandolin slicer to create uniform, thin slices. I placed the slices on a parchment paper-lined baking sheet. I put the seasoning into an empty spice jar (with a shaker top) and shook the seasoning onto the slices.
After that, I preheated the oven to 350 degrees. It will be trial and error to get the chips crispy without burning them. KEEP YOUR EYE ON THEM! I recommend keeping the oven lower for most of the time to dry out the chips and raise the heat just a bit to crisp them up at the end. Count on anywhere from 20-30 minutes of cooking time. Just make sure the chips are fully crispy before storing them in an airtight container. Or, eat them all with your family in one sitting! :-) A large jicama (1200 grams) contains only 456 calories!

Saturday, July 14, 2018

Chocolate Peanut Butter Hummus (Refined sugar-free, dairy-free, gluten-free, vegan)

1 1/2 cups cooked chickpeas/garbanzo beans
3 T cocoa or cacao powder
3 T natural peanut butter (no oil, salt, or sugar added)
4 gooey Medjool dates or date syrup to taste
a small amount of aquafaba (liquid left in the can of chickpeas or after cooking them homemade) or any non-dairy milk to blend to right consistency
1/8 t of salt (optional)

Blend all ingredients until very smooth and chill before serving. Serve on baked whole wheat lavash crackers, whole grain bread, or even on apple slices!

Monday, May 7, 2018

Raw V-8 Crackers

1 bunch of organic kale leaves
5 vine-ripened organic tomatoes
1 stalk organic celery
2 organic carrots
1/2 cup walnuts
1 t. onion powder
1 t. garlic powder
a sprinkle each of oregano and basil (optional)
1/2 cup of ground flaxseeds
pink Himalayan salt

In the food processor, INDIVIDUALLY process   (in this order) the walnuts, kale, celery, carrots, and tomatoes,
then put each ingredient in a large bowl. Add the seasonings (except the salt) and ground flaxseeds. Stir everything together well. After spreading them on the trays, sprinkle a tiny amount of pink Himalayan salt over the top. Put them in the dehydrator at 135 degrees for 1 hour, score them into squares with a pizza wheel or a knife. Then, reduce the temperature to 118 degrees.  After 6 or 7 hours flip them, then let them finish overnight. They are light, crispy, and delish! FULL of nutrients!

Friday, March 9, 2018

Pineapple "Coconut" Muffins [no flour]

Pineapple chunks from a 15-oz can of unsweetened pineapple chunks (you can use the juice for a sauce or another recipe)
1 large cooked white sweet potato, peeled
3 soft Medjool dates, pitted
2 T. ground flaxseeds
2 cups oats
2 T. chopped walnuts
1/2 t coconut extract
1/4 cup Vitacost brand apple juice-sweetened dried cranberries or golden raisins
Preheat oven to 350 degrees F.
Pulse the pineapple chunks, sweet potato, dates, and ground flaxseed in the food processor about 3 or 4 rotations. Transfer mixture into a bowl and stir in the oats, chopped walnuts, and cranberries, combining everything well.
Make balls of the "dough" with your clean hands and place them into non-stick muffin cups. These will stay relatively the same shape, so you can press them lightly into the muffin cups so they will look more like muffins when they finish.
Bake for 55 minutes, or until firm and lightly browned on the outside.
NOTE: I used my favorite USA PAN muffin tin. The muffins pop RIGHT OUT!
Affiliate Link >> http://amzn.to/2p0PLht

Thank you to Heather Goodwin for inspiring this recipe!

Sunday, March 4, 2018

"Honey" Mustard Pretzel Nuggets

Sometimes, I desire some of my old favorite snack foods. Since most of them are make from junky ingredients (vegan or not!), I usually just refrain. But, I got this idea to make one of my old faves--Honey-Mustard Pretzel Nuggets. I decided to use the healthy Philly-Style Soft Pretzels recipe from the Prevent and Reverse Heart Disease Cookbook, but revise it to make this crunchy snack. So, here's what I did:

I made the dough for the pretzels exactly as the recipe said on p. 144. I just kept the dough in a ball and let it rise per the directions.

I preheated my oven to 400 degrees, per the instructions. Then, I went right to the instructions for boiling the water with the baking soda added. I pinched off small nuggets of the dough, dropping in about 10 at a time. I left them in the water for 10 seconds, then I removed them with a slotted spoon and placed them on a parchment-lined baking sheet. I didn't add any salt or seasonings. I just baked them for about 15 minutes, then I lowered the oven temperature to 350 degrees and baked them until they were crispy.
NOTE: The time on this will vary depending on your nugget sizes. Keep a close eye on them.

After the nuggets were crispy, I mixed together 1/4 cup yellow mustard and 2 T of either maple syrup, agave, or coconut nectar in a large bowl.  I tossed the pretzel nuggets in the mixture. Then, I returned them to the baking sheet and baked them another few minutes until the "honey" mustard dried onto the pieces and the pieces crisped back up.

NOTE: Keep your eye on them because you don't want them to get too dark. Cool before eating them.

Saturday, February 10, 2018

Make Your Own Peanut Butter--Cleaner and Cheaper!

There is never a need to buy peanut butter if you have a Vitamix, a Blendtec, or a Ninja blender! This peanut butter is clean...made from ONLY peanuts.

Here's an older video I made showing how to make peanut butter: https://www.facebook.com/mrsplantintexas/videos/683642098456044/

Also, check out the BEST jar spatula I have ever used!

Make sure to follow MRS. PLANT and join our MRS. PLANT COMMUNITY!


Thursday, December 21, 2017

Peanut Butter "Caramel" Apples

Peanut Butter "Caramel" Apples -- inspired by a recipe in the Forks Over Knives magazine. It called for brown rice syrup, but we used date syrup instead. STUNNING! [photo credit: my son who is messing with a new photo app!]

This is how we made ours...

1/3 cup natural, homemade peanut butter (SOS-free!)
2 T date syrup
3 Fuji apples, washed and dried well
chopped dry-roasted peanuts
3 forks

Wash and dry each apple well and spear each one with a fork. Place the peanut butter into a very small bowl. Then, warm the date syrup in another tiny bowl in the microwave for about 15-20 seconds so it's thin and runny. Mix it into the peanut butter. Hold a fork-speared apple, and gently spread the peanut butter mixture on it in, then roll in chopped peanuts.

Inspired by Isa Chandra Moskowitz

Tuesday, December 12, 2017

No-Bake Holiday Snack Dots

It's hard to say NO to every sweet around you during the holiday season. For me, having a good alternative usually suffices. I whipped up this healthy treat for those times that we feel like we want junk but would rather not go there!

1 1/2 cups old-fashioned rolled oats
6-8 Medjool dates (depending on how sweet you want these), pitted
2 T cocoa powder
3 T Naked PB peanut butter powder or other peanut butter powder without added salt, oil, or sugar (if possible)
2 T walnuts
2 T raw pumpkin seeds
1 1/2 t hazelnut extract (or vanilla extract, if you can't find hazelnut extract)
1-2 pinches of salt
a few tablespoons of non-dairy milk

Put all ingredients in a food processor EXCEPT the non-dairy milk. Pulse until combined. Add the non-dairy milk 1 T at a time until the mixture comes together like a course dough. Use a 1 T cookie scoop or  your hands to shape balls. Place on parchment paper and chill in the fridge before serving.


Disclosure: Mrs. Plant makes use of Amazon.com affiliate links when they are available. These are products I have personally purchased and recommend based on my experience with them. Your use of these links for product purchases provides me with a commission which pays for the food and supplies I use to keep this website alive. However, your use of these links as a reader is not required.